Turn 9. The declares , and you look down at a hand that was two away from something cheap. Not one tile in it matches their river. No . No . One of your 14 tiles has to go, and every one of them can lose.
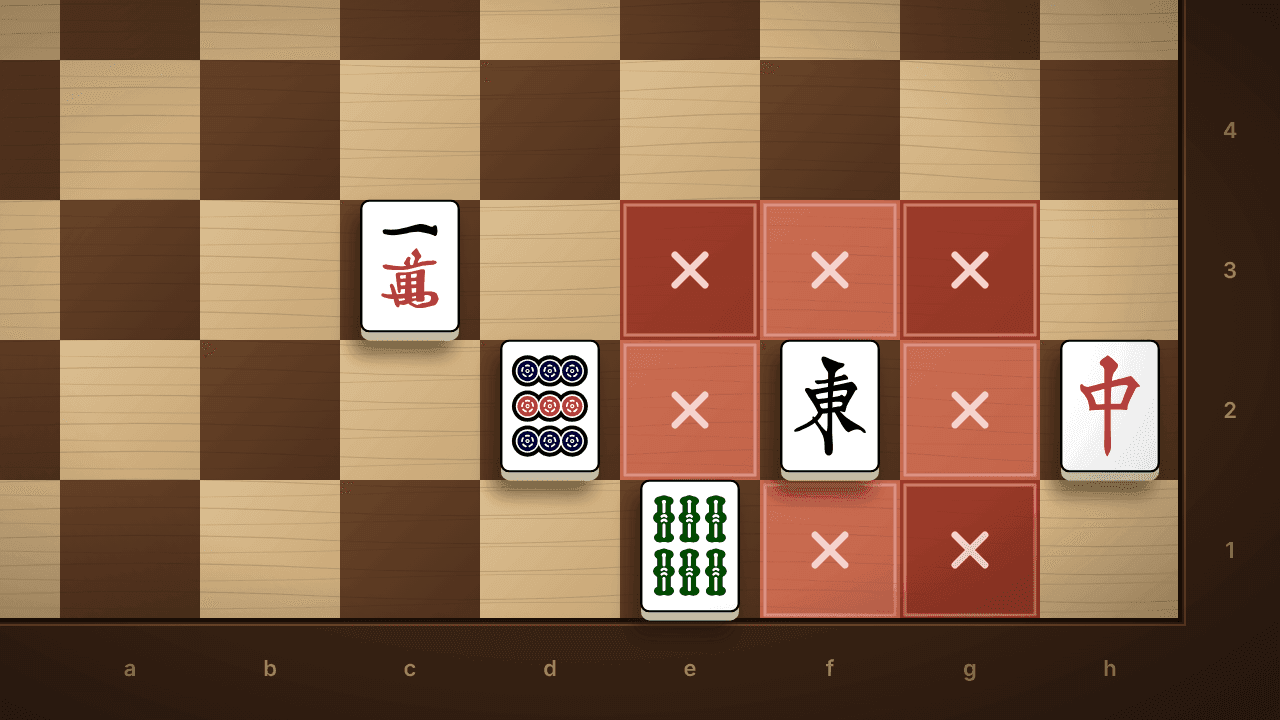
Chess has a word for this. Zugzwang is the position where every legal move makes things worse, and the one good move, passing, is against the rules. Mahjong doesn't let you pass either. Its zugzwang has an order, though: some tiles lose 4% of the time and some 11%, and the data says which. It also has two exits chess never had.
Where zugzwang comes from
German: Zug, a move, plus Zwang, compulsion. The Wikipedia article has the history: an unsigned piece in the September 1858 Deutsche Schachzeitung, Emanuel Lasker's first English use in 1905, and common English use only in the 1930s, after Nimzowitsch's My System was translated. The game everyone cites is Sämisch against Nimzowitsch, Copenhagen 1923, the "Immortal Zugzwang Game", where White resigned because every move gave something up.
What separates zugzwang from a plain bad position is the obligation. Having the move is normally an advantage. In zugzwang it's the harm: the best move would be to pass, and the rules say no. The defender isn't losing because of where his pieces stand. He's losing because he has to touch one.
Mahjong's version: a riichi and no safe tile
Mahjong has the same obligation and no pass. A riichi goes up, and every turn after it asks the same question: which of these 14 tiles costs the least to put down.
Three reads answer it, and the suji guide covers all three. Genbutsu rules out every wait. Suji rules out the and , 59% of riichi waits in Tenhou's Houou room, and leaves the , , , and , 37%. needs four copies of a tile in view.
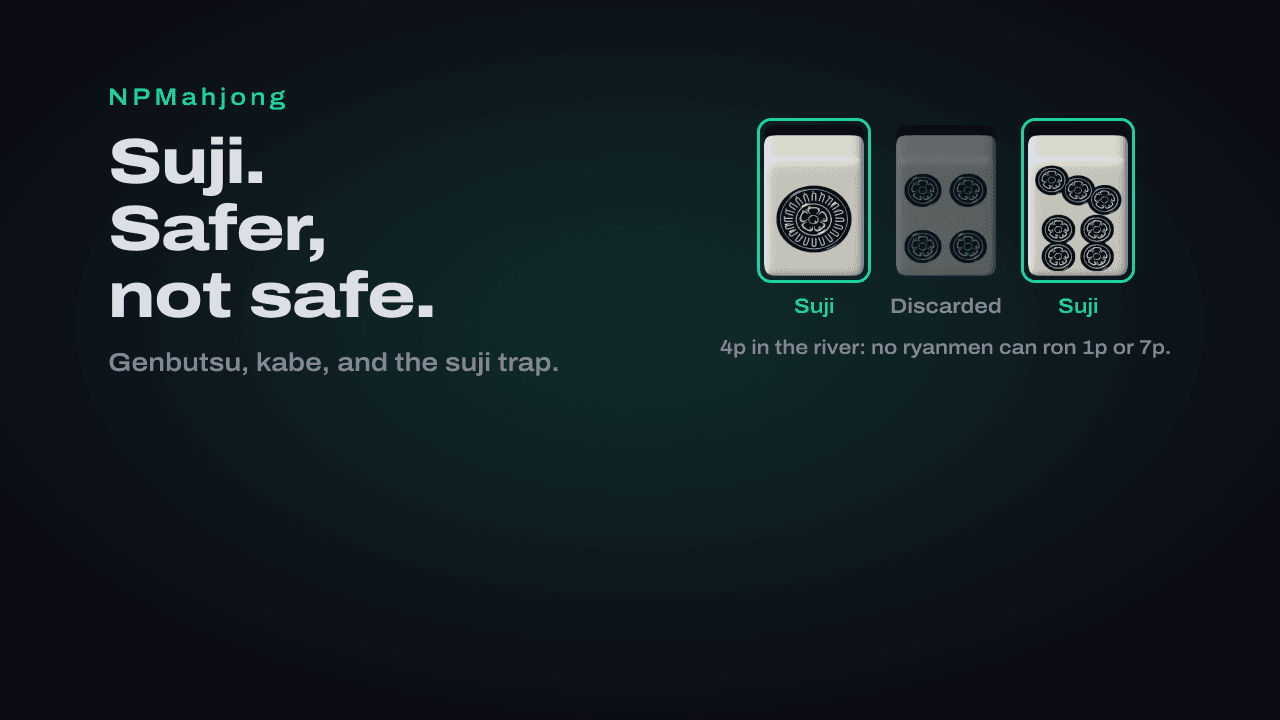
Zugzwang is when all three come up empty. It happens more than it should: the hand you were building needed live middle tiles, and live middle tiles are what a riichi waits on.
The least-bad tile, in order
The numbers come from Tenhou Houou logs 2016 to 2020, analysis by chienshyong, through the suji guide, the dora danger post, and the wait win rate post. Each share is how often a riichi hand waits on that tile before any read: your chance the moment you throw it.
| Order | Tile | Still loses to | Share of riichi waits |
|---|---|---|---|
| 1 | Honor with two other copies visible | A tanki on the last copy | 0.6% for an honor dora |
| 2 | 1 or 9 with no read | One , tanki, shanpon | 4.1% |
| 2 | Fresh honor, no copy visible | Tanki, shanpon | 6.9% for an honor dora |
| 2 | Half-suji 4, 5, or 6 | One ryanmen, , tanki, shanpon | About the same as a 1 or 9 |
| 3 | 2 or 8 with no read | Ryanmen, kanchan, tanki, shanpon | 5.3% |
| 4 | 3 or 7 with no read | Ryanmen, kanchan, , tanki, shanpon | 6.2% to 6.3% |
| 5 | 4, 5, or 6 with no read | Two ryanmen, kanchan, tanki, shanpon | 7.8% to 8.0% |
| 6 | The dora, whatever its number | The same shapes, more often | 10.9% to 11.5% for a middle dora |
Honors: fresh and once-cut are different tiles
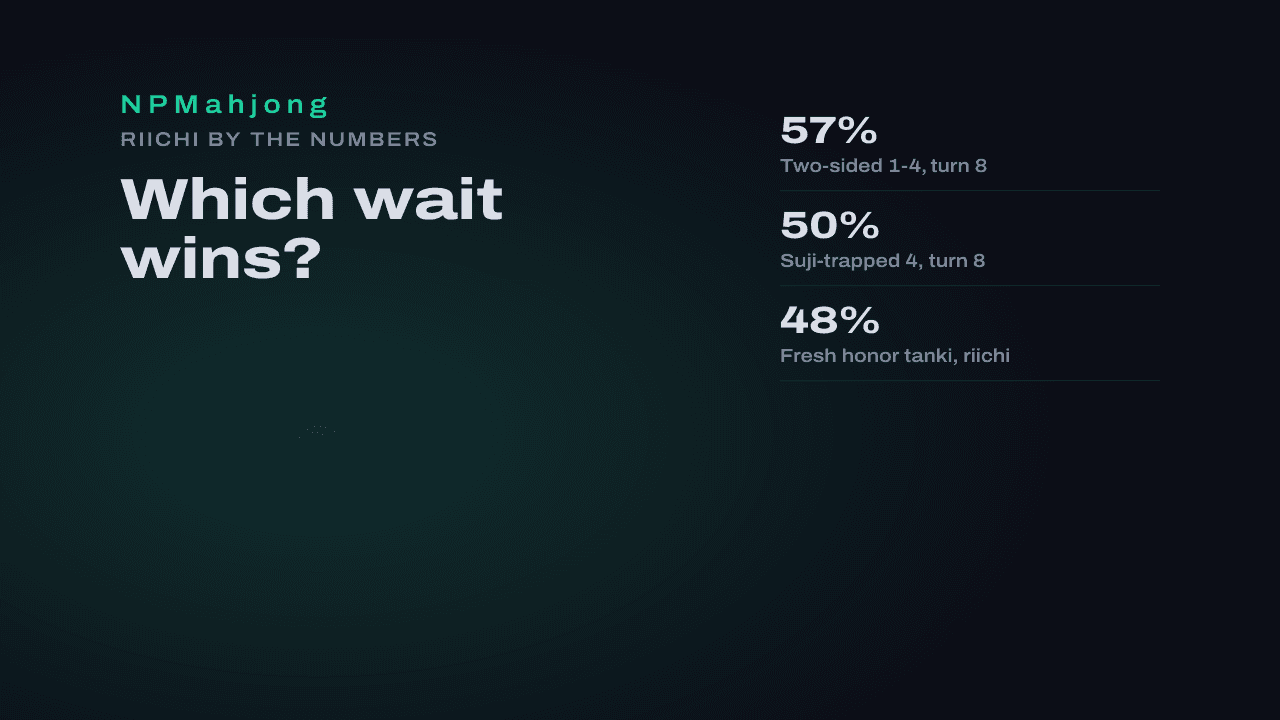
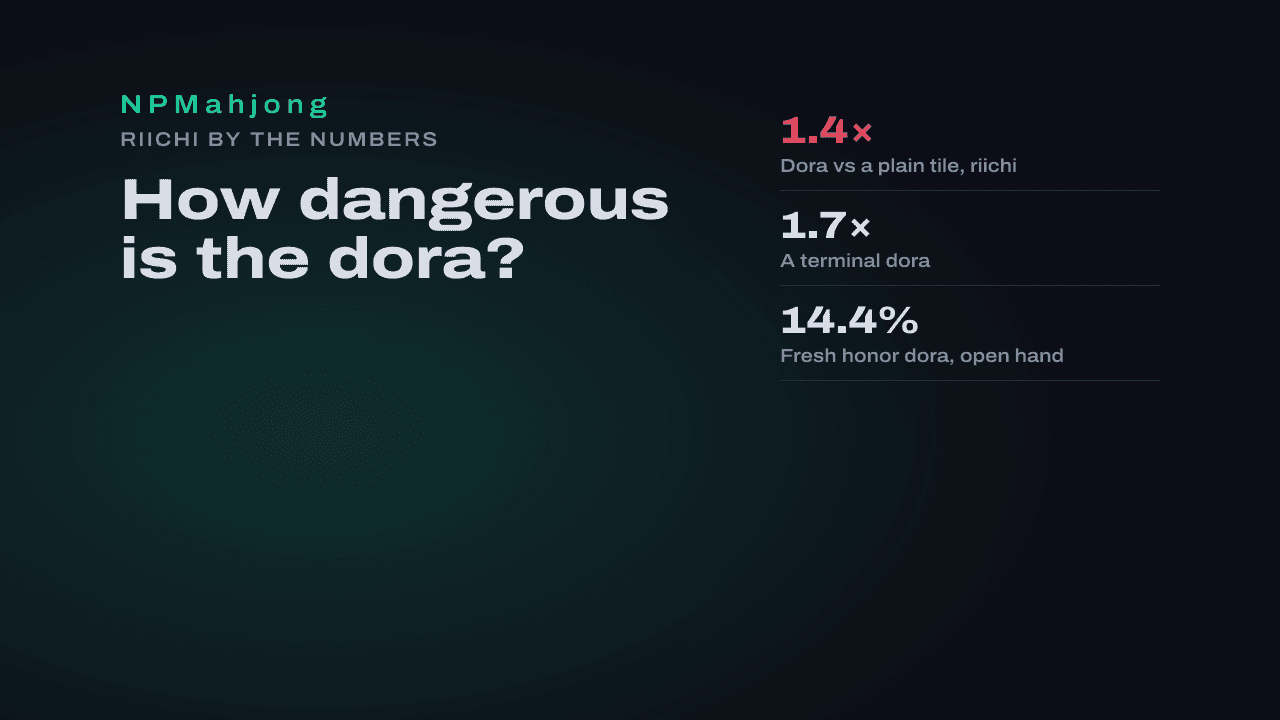
A fresh honor loses only to a tanki or a shanpon, so players throw it on reflex. The reflex is half right. A fresh honor dora sits in 6.9% of riichi waits, the same band as a plain 1 or 9, and the wait data shows who's on the other end: a riichi on a fresh honor tanki wins 48% at turn 8, and only 30% of those wins come by . The rest are handed over by players folding "safe" honors. Honor waits are the one place riichi beats , 48% against 40%: the stick makes the table fold, and folding feeds the wait.
One copy out drops an honor dora from 6.9% to 2.1%, two copies to 0.6%. Against an open hand a fresh honor dora is worse: 14.4% of open hands at wait on it, twice the riichi rate, most of it a shanpon.
The dora goes last
The goes last whatever its number. A riichi waits on it 1.3 to 1.7 times as often as on the same tile when it isn't dora, and the extra danger is all bad waits: single-tile waits on a dora 2 through 8 show up 2.0 to 2.7 times as often as normal, two-sided ones 1.0 to 1.3. A dora 4 is in 11.1% of riichi waits against 7.8% for a plain 4.
A worked fold with nothing safe
East 3, you're South, the dora indicator is 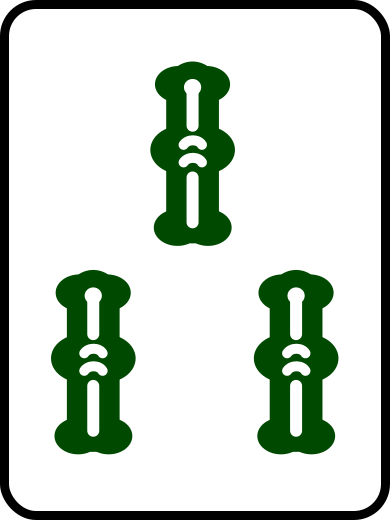 , so the dora is
 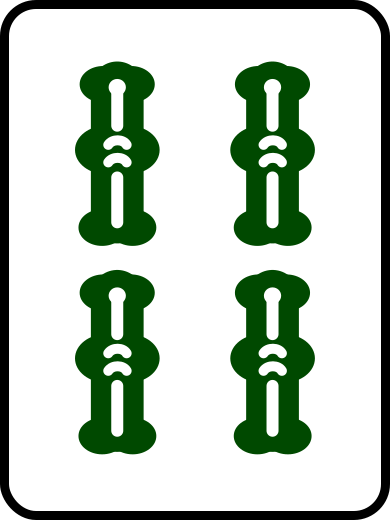 . The player across declares riichi on their ninth discard:
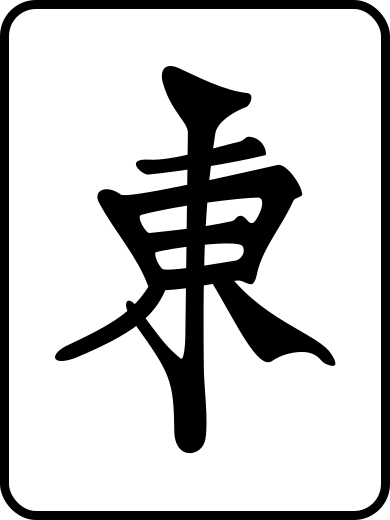
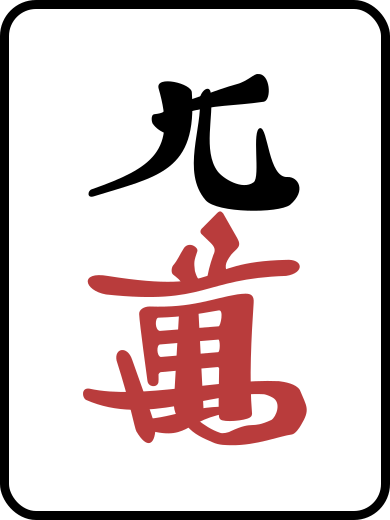
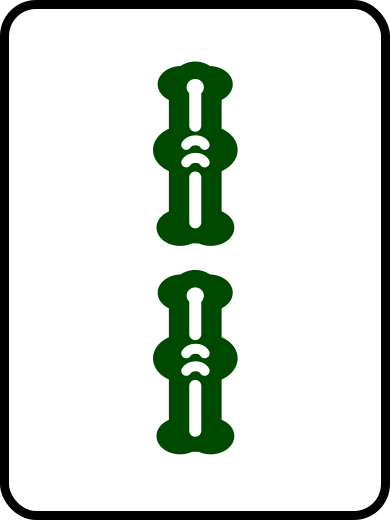
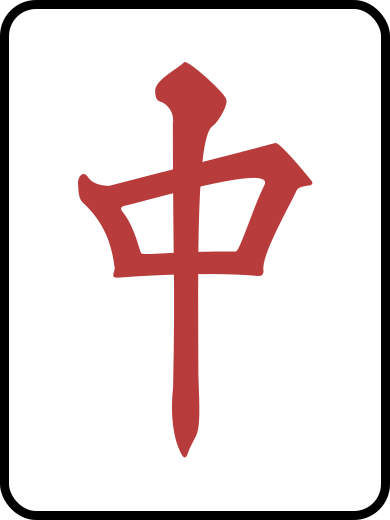
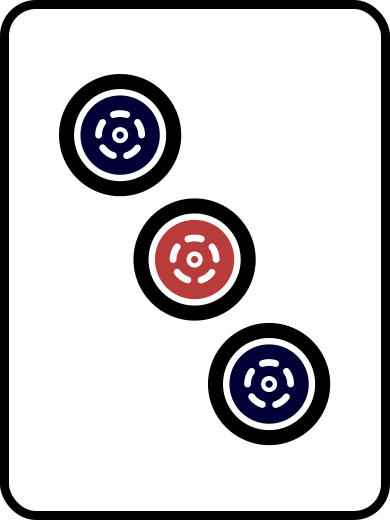
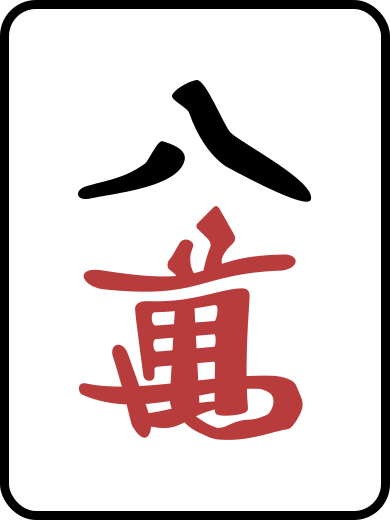
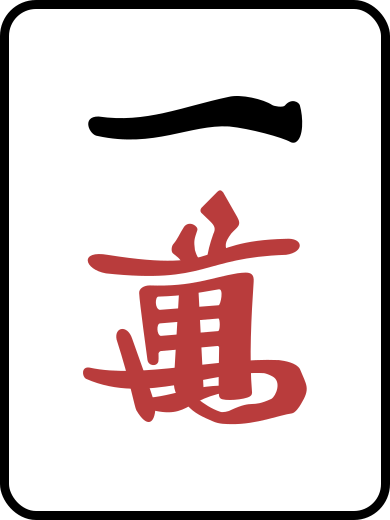
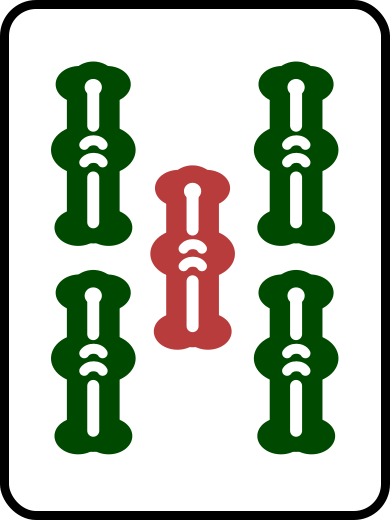
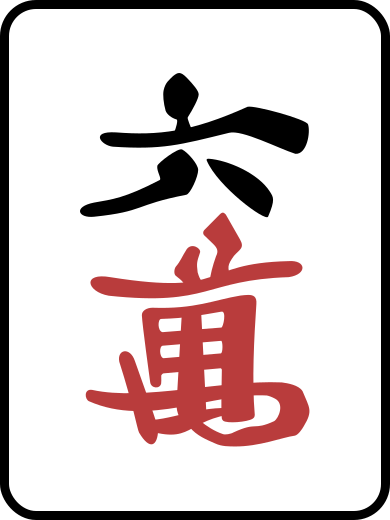
Both other players cut a 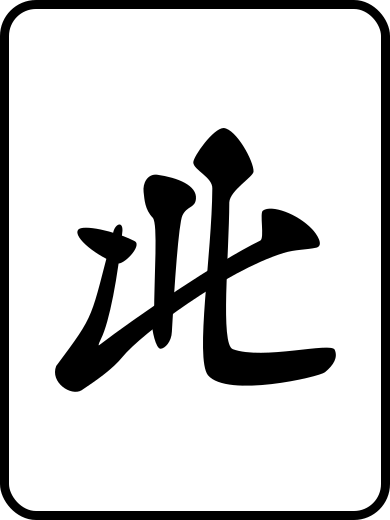 earlier. You draw a
 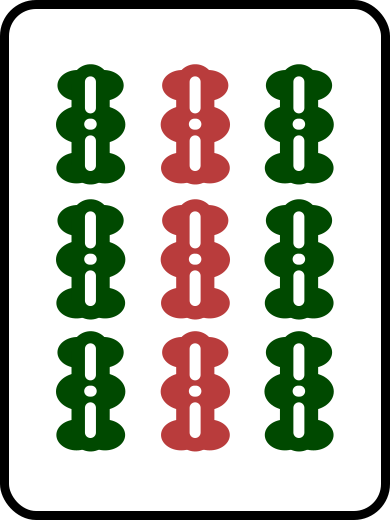 and hold this:
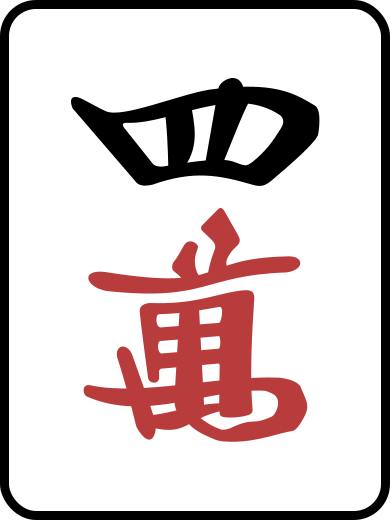
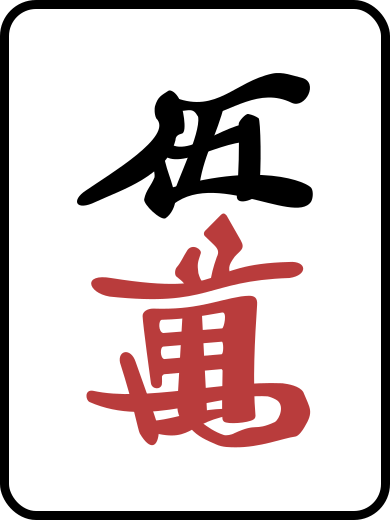
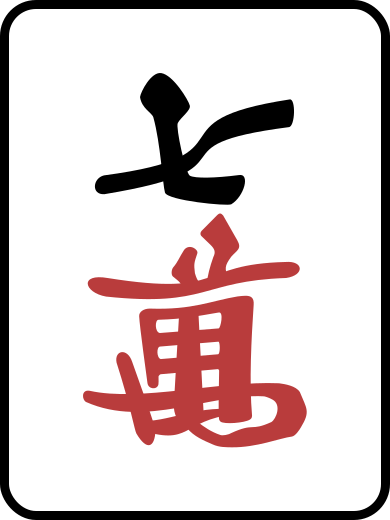

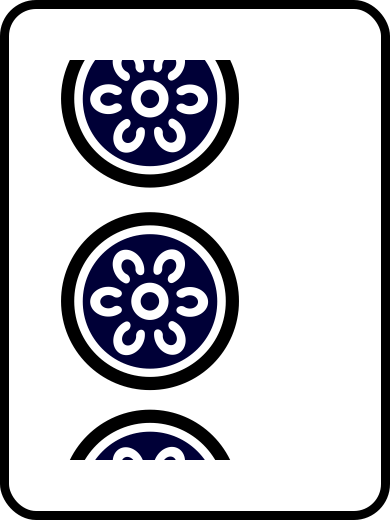
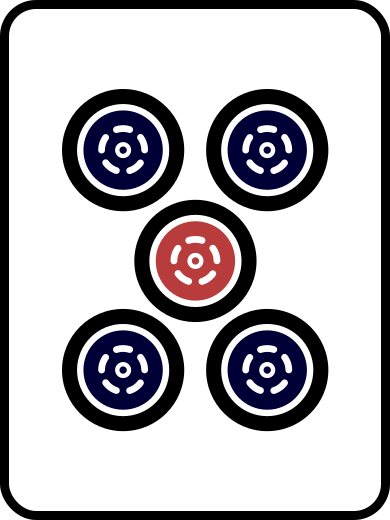
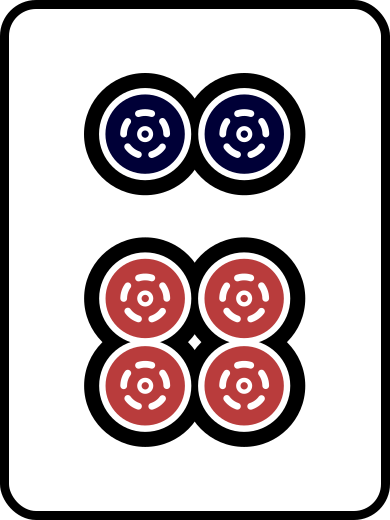
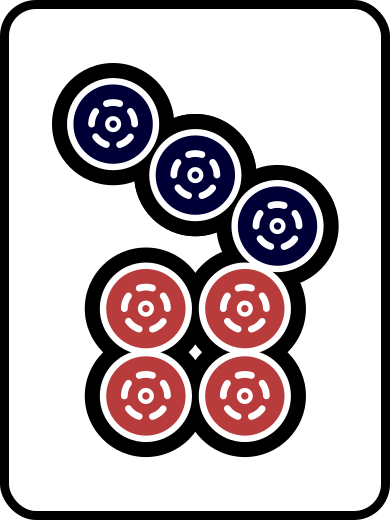
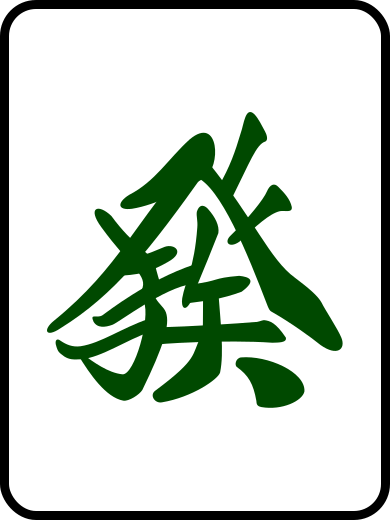
Two-shanten, one dora, without riichi. It folds. Nothing in it is genbutsu, and the only full-suji tiles, the 3m and the 8s, aren't in it. Here's what is, safest first.
| Tile | Read | Band |
|---|---|---|
| Two copies seen, only a tanki on the last copy beats it | Safest you hold |
| | No read: the 6s and the 4p aren't out | 4.1% |
| Fresh, loses to tanki or shanpon | About a 1 or 9 |
| | Half suji: the 1m, 8m, and 3p are out, the 7m, 2m, and 9p aren't | About a 1 or 9 |
| No read | 5.3% |
| No read | 6.2% |
| | No read | 6.3% |
| No read, two live ryanmen | 8.0% |
| Dora, no read | 11.1% |
The North goes first: only the last copy beats it. Then the 9s and the 1p. Then the three half-suji tiles, and the after them, because of the four tiles in that band the honor is the one most likely to get safer on its own: honors are the first tiles folding players throw, and one copy in anyone's river after the riichi makes yours genbutsu. That's seven discards before you touch the 2p, and the hand has about eight draws left.
Two habits carry the fold. Reread every tile every turn: a tile that passes is a new genbutsu, and a 7m from anyone makes your 4m full suji. And a drawn genbutsu goes straight back out, . You stopped having a hand on their ninth discard.
The move chess doesn't have: sashikomi
A chess player in zugzwang has one way out, the least bad move. A mahjong player has a second, and it looks like a blunder. is dealing in on purpose: you throw a tile a cheap hand is waiting on, pay 1,000 or 2,000, and end the hand on your terms.
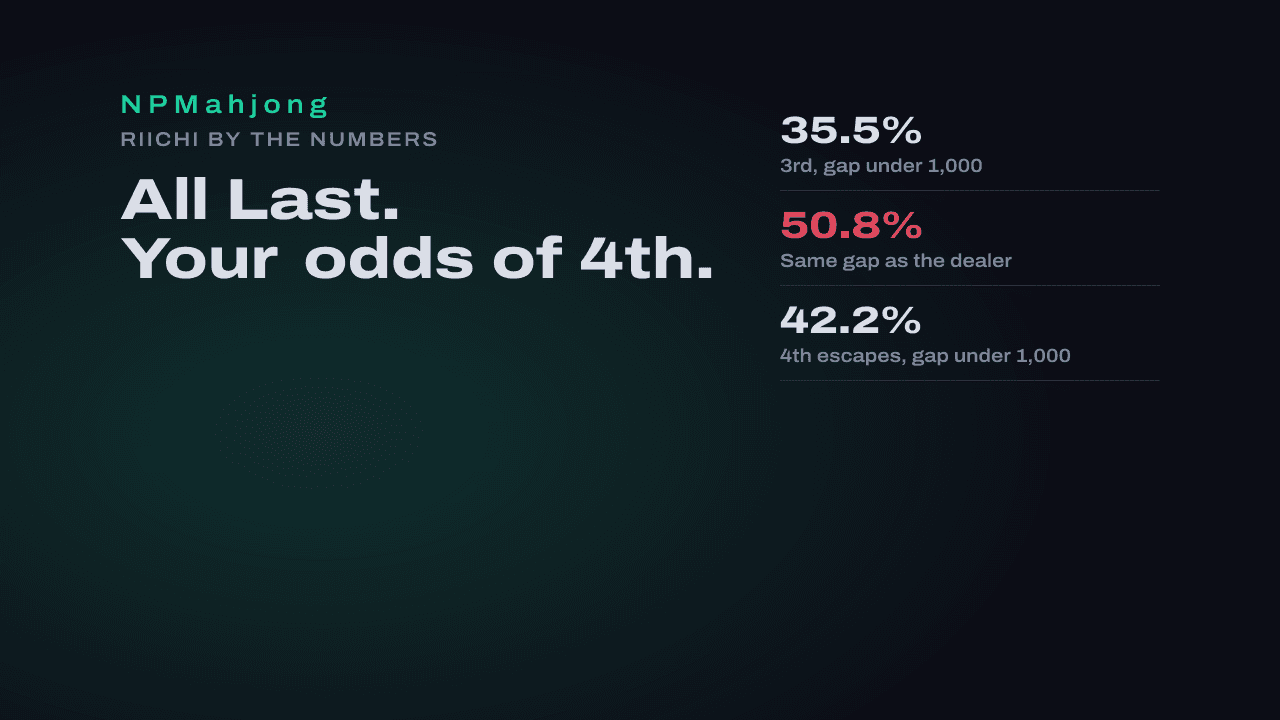
It exists because of . In the All Last data, scores still move about 4,800 points from the start of the last hand to the end of the game, and a dealer who keeps winning keeps the game alive: at a 10,000-point gap, 3rd still finishes 4th 11.3% of the time when 4th is the dealer, almost double the 6.5% against a . A dealer on a run keeps every placement open, and a clean fold doesn't close it. Dealer at the draw, and the dealer deals again.
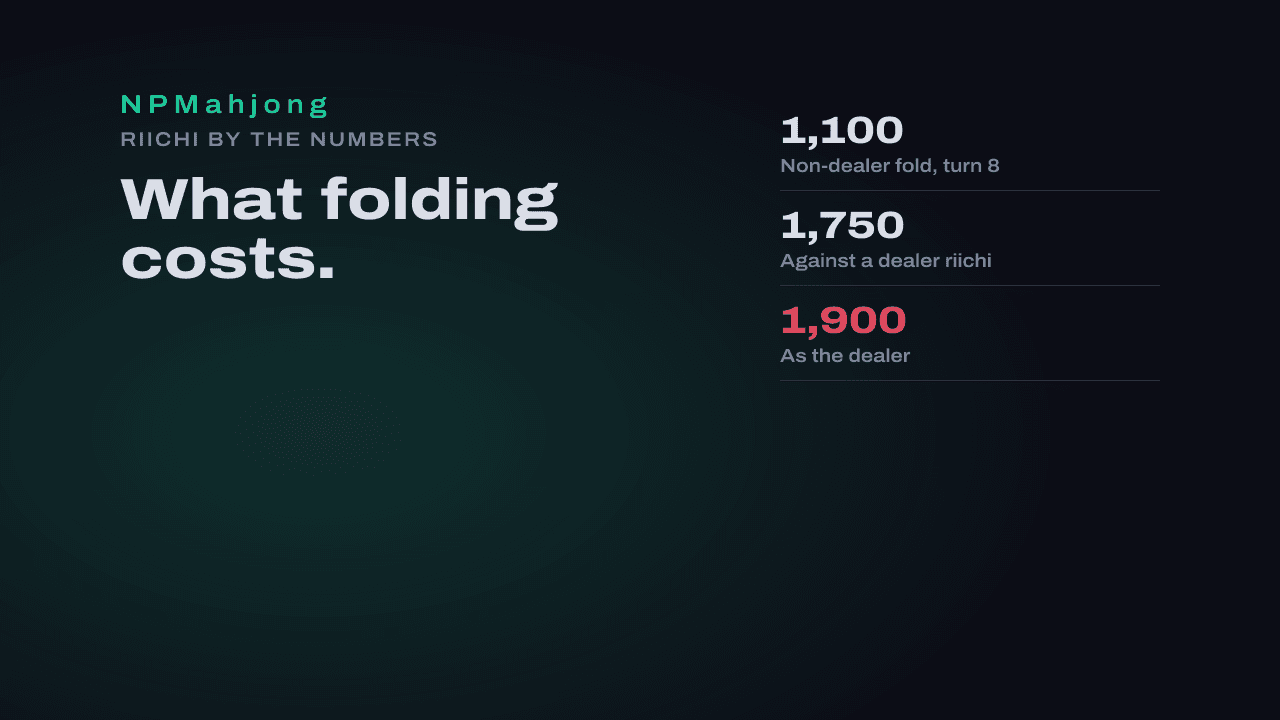
So the leader looks for the cheap hand. The player on your right has two melds showing, no and no dora in them, and has cut from hand since the second call: tenpai, worth 1,000 or 2,000. Feed it. An average deal-in into a riichi costs about five clean folds; a 1,000-point sashikomi costs less than one. Against a dealer riichi, the clean fold itself runs 1,750 points at turn 8 in the fold price data, and that assumes you had safe tiles to fold with.
Three conditions. The hand must be open, because a closed hand's value is a guess and a riichi's is a guess plus . The tile must be safe against the riichi, or the safest you have: if the riichi player can it too, rules give it to whichever of them sits closer to you, and rules to both. And the result has to settle something: a dealership, the game, or a placement. A sashikomi that settles nothing is a deal-in with a story.
The draw is your pass
Chess zugzwang has no clock. Mahjong's runs out: the wall ends, the hand is drawn, and a payment is the worst that can happen. The draw is the pass the rules don't otherwise give you, and reaching it is the whole plan of a fold.
Two things get you there. The first is the count the fold price post ends on: three safe tiles by the middle of the hand, or two in the last turns, and you can fold to the wall. Fewer, and the fold is a push with worse tiles. The second is the clock, which runs for you. The worked hand started with one safe tile; three turns in, the other players have put down nine more, and every one that passed is yours to throw.
You can't call the hand off, either. Nine terminals and belong to the first go-around, so once a riichi is up the only exit is the last tile of the wall.
Where the analogy breaks
Chess zugzwang is exact: the move loses, and the player can see it. Mahjong's is a probability. The worst tile in the worked hand loses 11% of the time and the best under 1%. No single discard is a blunder. A few hundred of them are a deal-in rate.
The other difference is who's stuck. The folding player changes plans every turn. The riichi player can't: a riichi hand can't fold, and every drawn tile has to come out, whatever it is. That's why single-tile riichi waits deal in 14% to 15% of the time at turn 8 and two-sided ones 10% to 11%. The player who declared is the one in zugzwang. You're the one who still gets to choose.
Three hands from your last log
Find three hands in your last log where a riichi went up and you held no genbutsu. For each discard you made against it, open the deal-in danger tool, pick riichi, pick the tile and how it relates to the dora, and write the number next to the tile you threw. Then put the tiles you held in the order above and mark every turn where a safer tile sat in your hand. Look for a fresh honor thrown ahead of a half-suji tile, and a dora held one turn too long in a hand that was never going to use it.
When the question is whether to fold at all, run the hand through the push or fold calculator first. Look up any term in the glossary.
Get your folds checked
The hands with no safe tile decide your deal-in rate. Send me a log for review and I'll mark every discard against a riichi where a safer tile was sitting in your hand.
Was this article helpful?