
Furiten
Learn furiten (振聴, フリテン) before you call your first ron. Older English texts call it the "sacred discard." A player in furiten can't win by ron (ロン). Tsumo (自摸) still wins.
It all comes down to your discards. Three things put you in furiten: your own river, a winning discard you let go by, and a winning discard you let go by after you declare riichi (立直).
Discard furiten
Early in a hand you throw tiles that don't help you yet. The hand keeps changing, you reach tenpai (聴牌), and one of your winning tiles is already in your river. Maybe you threw it because it gave you no yaku, but it still completed the shape: four sets and a pair. From that moment you're in furiten, and you can't ron on any of your winning tiles.
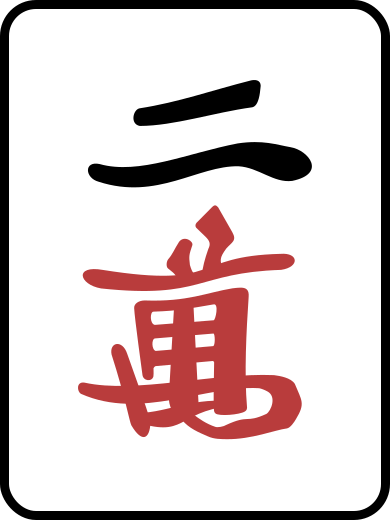
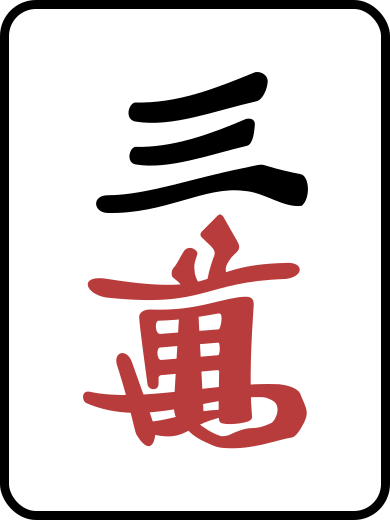
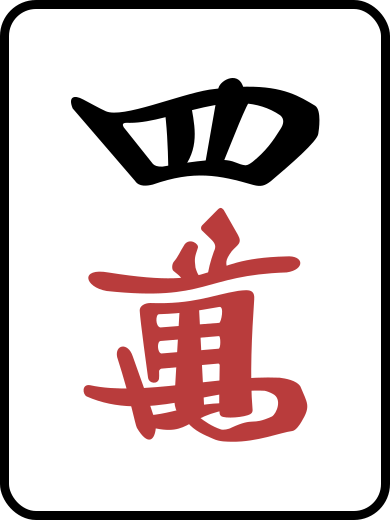
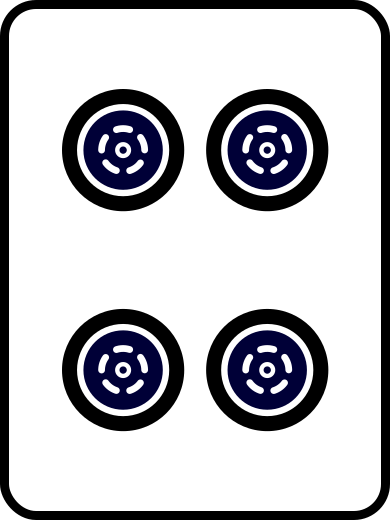
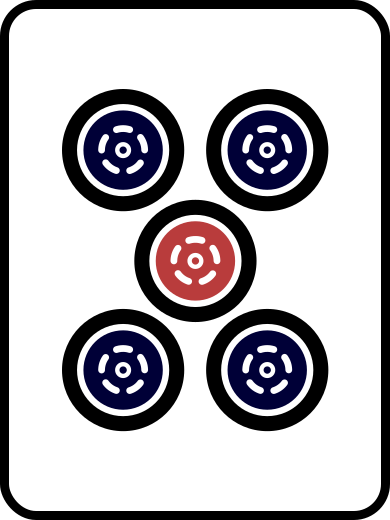
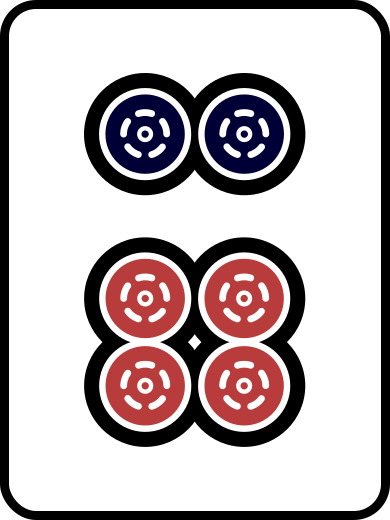
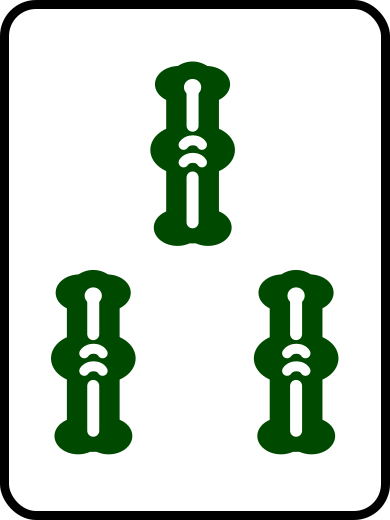
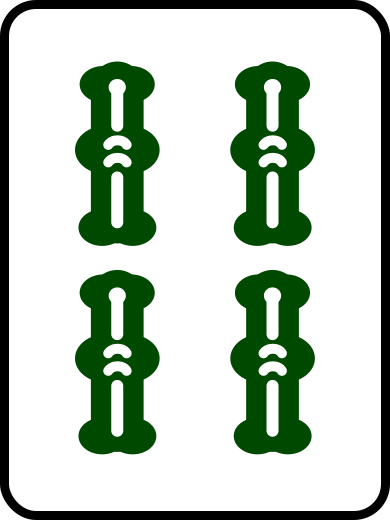
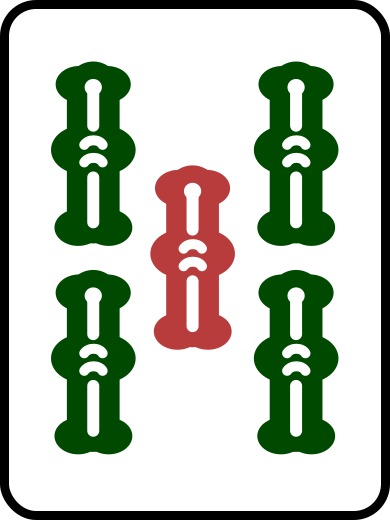
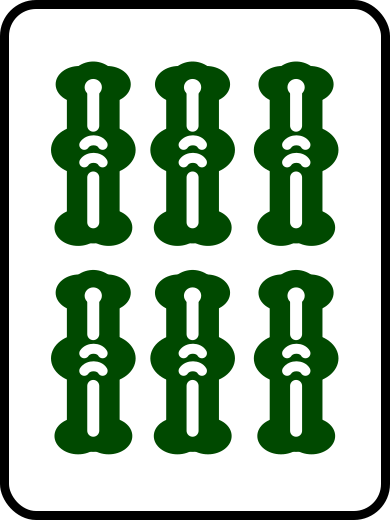
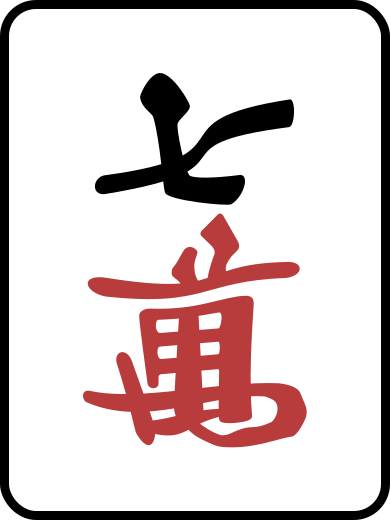
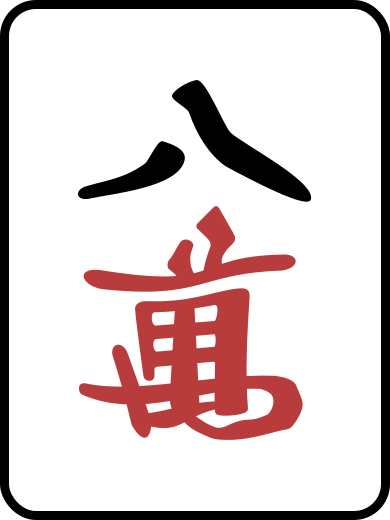
This hand waits on the 6 or the 9 man. The 6 gives you tanyao (断么九) and pinfu (平和). The 9 gives only pinfu. Say you discarded a 9 man early in the hand. You can't ron the 9. You can't ron the 6 either, even though you never threw one. The rule never changes: furiten on one tile of your wait blocks ron on all of them.
Tiles an opponent called from you with chi, pon, or kan count too. They came from your river, even though they're no longer in it.
This furiten lasts as long as one of your winning tiles sits in your river. You have two ways out:
- Change your hand so the wait no longer includes any tile in your river. From then on, ron works again.
- Stay in furiten and win by tsumo. Nobody can stop a tsumo win, furiten or not, as long as you have a yaku and your hand isn't dead (see dead hand).
Calling ron in furiten is a serious foul, and it costs you a chonbo. Build a habit to avoid it. Every time you reach tenpai, name your winning tiles and look for each one in your river. You can also plan for furiten earlier and drop shapes that wait on tiles you've already thrown. Pay a little attention to your discards and it'll almost never happen to you.
Temporary furiten
Temporary furiten comes from your opponents' rivers, not yours. Look at this hand:
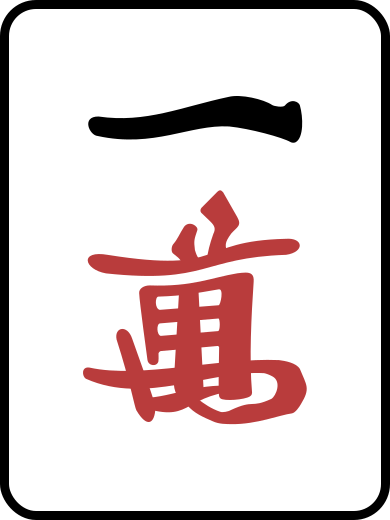
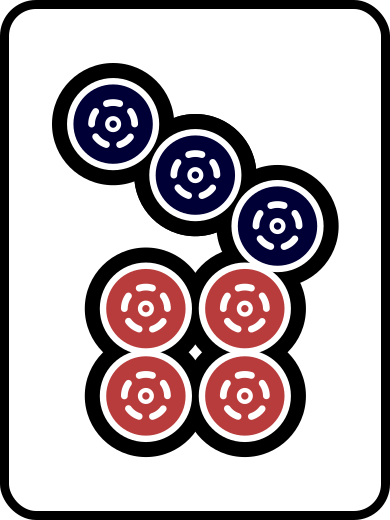
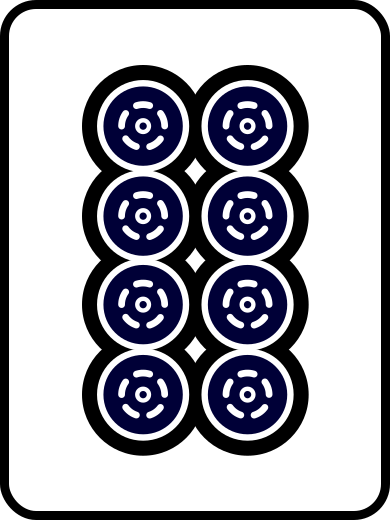
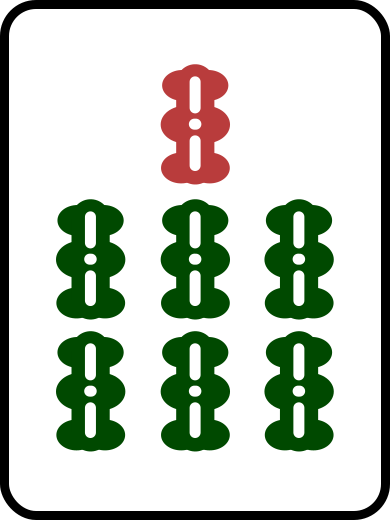
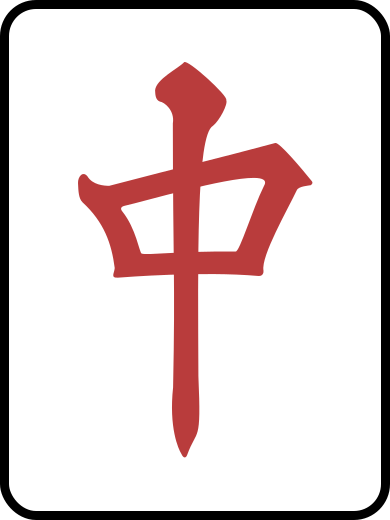
It waits on the 7 sou or the red dragon. If an opponent throws a red dragon, you complete a dragon triplet. That's a yaku, so you can ron. If an opponent throws the 7 sou, you can't: the hand would have no yaku. You could win on the 7 sou by tsumo, though, because menzen tsumo is a yaku.
Now follow one full lap of the table. The player on your right throws a 7 sou. You can't ron it. The player across throws something you don't need. The player on your left throws a red dragon. You can't ron.
When an opponent discards one of your winning tiles and you don't win on it, you're in temporary furiten. The reason doesn't matter. You didn't want to, it wasn't worth it, you weren't looking, or, as here, you couldn't. Temporary furiten ends when your turn comes back around, or earlier if you make a call. If you had thrown that 7 sou yourself, you'd be in discard furiten until you changed your wait.
Riichi furiten
After you declare riichi you can let a winning tile go by, but you're in furiten until the end of the hand. You can only win by tsumo. A riichi hand can't change, so this furiten has no way out.
Safe tiles and common mistakes
Furiten has a big practical side. The tile the player on your left just discarded is the safest tile at the table for your next discard: nobody can ron you on it. The player who threw it is in discard furiten, and the other two let it go by without drawing since. A tile that sits in all three opponents' rivers is safe for the same reason.
So furiten helps you sort safe tiles from dangerous ones. It also makes cheating harder, and it gets in the way of aiming (直撃狙い, chokugeki nerai): waiting on purpose for a tile one particular opponent will throw.
The two most common mistakes when you call ron are winning with no yaku and winning in furiten. The first usually comes from calling tiles without thinking. The second comes from not looking at your own discards. The site's furiten guide has more hands to check yourself against.
Drill
Can you call ron?
Case 1 of 80/0
Assume your hand always has a yaku. Only furiten matters here.
Your hand
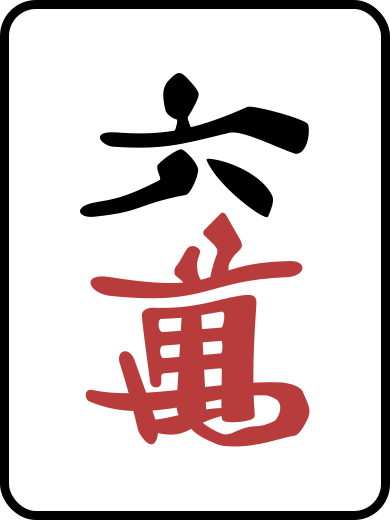
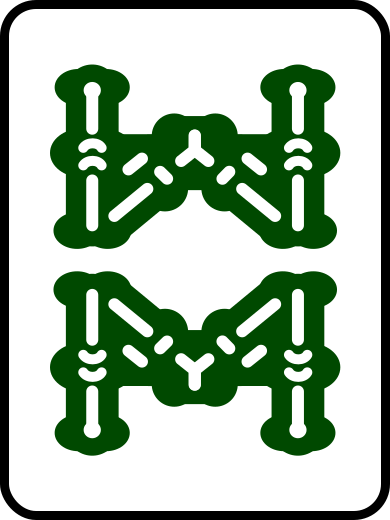
Your river
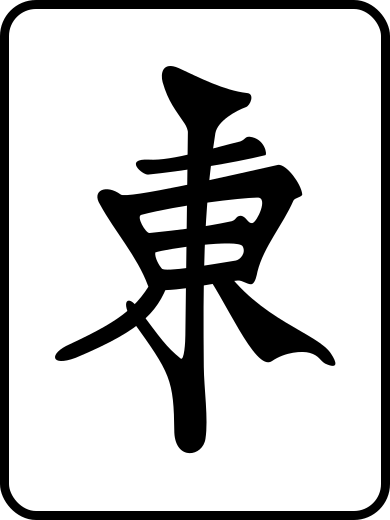
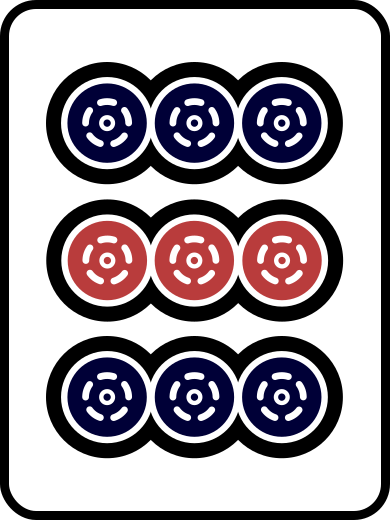
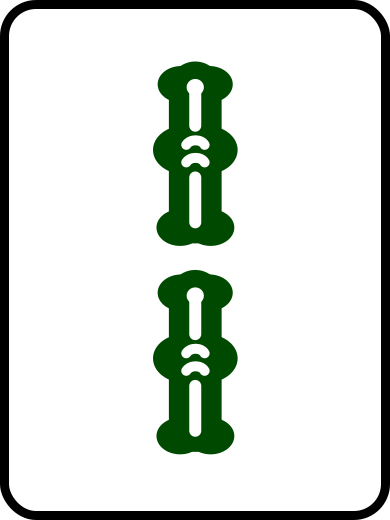
The sideways tile is your riichi tile.
No riichi. An opponent discards the 5 of characters.
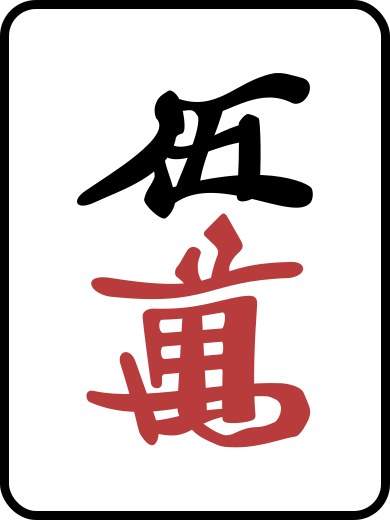
Can you call ron on the 5 man?
Pick an answer.
Optional rules
Before the first hand, the table agrees on its ruleset. Many rules are small variations. Some make the game simpler, others make it harder. Players call them house rules. In Japanese each rule is announced as ari (有り, "on") or nashi (無し, "off"): kuitan ari means you play with kuitan.
Today nearly everyone starts from the same standard: the one in Tenhou and Mahjong Soul ranked games, which most Japanese parlors also follow. For each rule I tell you what the standard is, and the table at the end collects them all. Everything else is a local variant. Learn them anyway, because you'll run into them.
Kuitan and atozuke
Playing ari-ari (ありあり) means playing with kuitan and atozuke both on. That's the standard in Japan. The opposite is nashi-nashi.
Kuitan (喰いタン), also called nakitan (鳴きタン), allows tanyao with an open hand. Kuitan makes it easy to put together a cheap, fast hand that cuts off an opponent's big one, and that's why some players prefer to play without it. You'll meet it again under tanyao.
Atozuke (後付け) lets you win even when your tenpai doesn't guarantee a yaku, as long as the winning tile supplies one. The temporary furiten hand above is an example. It wins by ron only on the red dragon, and with atozuke that's enough. The opposite is kanzen sakizuke (完全先付け): your tenpai has to guarantee a yaku whatever the winning tile is. Under that rule, the same hand couldn't ron on either of its two tiles.
Pinfu by tsumo
Pinfu still counts when you win by tsumo. The hand then scores pinfu and menzen tsumo, at 20 fu. By ron, pinfu is 30 fu. Every current ruleset counts it this way.
Kuikae
Kuikae (喰い替え), or swap-calling, means calling a tile and then discarding, on the same turn, a tile that would have completed the same set. Every current ruleset forbids it.
An example. You hold the 5 and 6 sou, and you chi the 4 sou from the player on your left. On that turn you can't discard another 4 sou or a 7 sou. Pon works the same way: pon a white dragon and you can't discard the fourth white dragon on that turn.
Points, return, oka, and uma
Each player starts with 25,000 points (配給原点, haikyuu genten). In Japanese that's nimangosenten-mochi (二万五千点持ち).
The return (返し, kaeshi) is what each player "owes" at the end, like the buy-in at a poker table. The standard return is 30,000 (三万点返し, sanmanten-gaeshi). When the game ends, each player's return is subtracted from their points.
The oka (オカ) is the prize that comes out of that gap. Every player started 5,000 points short of what they owe. Those 20,000 points (5,000 x 4) go to first place as a bonus.
The uma (ウマ) is a placement bonus: third and fourth pay second and first. These are the common ones:
- Gottoo (ゴットー, "five-ten"): +10, +5, −5, −10.
- Wantsuu (ワンツー, "ten-twenty"): +20, +10, −10, −20. Tenhou uses it, and so does this book.
- Wansurii (ワンスリー, "ten-thirty"): +30, +10, −10, −30. M-League uses it. Add the 20 from the oka and first place gets +50, which is why M-League publishes its placement points as +50, +10, −10, −30.
The scoring chapter shows how all of this turns into a final result.
Game length and the West round
The standard game is the hanchan (半荘): the East round and the South round. The short version, East round only, is the tonpuusen (東風戦). Tenhou and Mahjong Soul offer both. Don't confuse game length with the bakaze (場風), the wind of the round being played.
Shaanyuu (西入, "entering West") works like overtime. On Tenhou and Mahjong Soul, if nobody has 30,000 points when South 4 ends, the game goes into the West round as sudden death (サドンデス). It ends as soon as someone has 30,000 or more at the end of a hand. It goes no further than West 4.
Busting
Busting is also settled before play. It goes by many names: tobi (トビ), hakoten (ハコテン), buttobi (ぶっ飛び), or dobon (ドボン), which strictly speaking is the parlor version, with a prize for the player who causes it. The standard is that the game ends when someone drops below 0 points. At exactly 0, play goes on.
Noten payments
At an exhaustive draw, the noten players pay 3,000 points in all to the tenpai players (ノーテン罰符, noten bappu). Everyone plays it this way. The end of a hand chapter covers all four cases.
Renchan and agari-yame
Renchan (連荘) is the rule that decides when the dealer deals again. The standard is tenpai renchan (聴牌連荘): the dealer keeps the deal by winning the hand or by being tenpai at an exhaustive draw. The end of a hand chapter explains it in detail.
Agari-yame (アガリ止め, 和了り止め, "stop on a win") and tenpai-yame (聴牌止め) end the game early. In the last hand of the game (oorasu, or All Last), if the dealer wins or is tenpai and sits in first place, the game ends with no renchan. The dealer locks in the win and doesn't risk points on more hands. Tenhou and Mahjong Soul apply it automatically when the dealer is first with at least 30,000 points.
Dora
The table agrees on which dora to use. The standard is all of them: the dora, kan dora, ura dora, kan ura dora (kan ura), and three red fives (akadora), one per suit.
Ippatsu, open riichi, and ryanshi
Ippatsu (一発) is a yaku that nearly every ruleset uses.
Open riichi (オープンリーチ) is a riichi where you show your hand or your wait. If the table plays it, it has to agree whether you show the whole hand or only the wait, and whether a player who deals into an open riichi pays a yakuman. The standard is to leave it out.
Ryanhan shibari (二飜縛り), or ryanshi (リャンシ), raises the minimum to win from 1 han to 2. Where it's used, it usually kicks in from 5 honba.
Limits, kazoe, and yakuman
Aotenjou (青天井, "blue sky"; in English, skyrocketing) is play with no scoring limits. Normally big hands pay fixed limits (mangan, haneman, and so on) so the points don't run away. With aotenjou every hand goes through the same formula, and the totals get absurd. Almost nobody plays it.
Kiriage mangan (切り上げ満貫) rounds 4 han 30 fu and 3 han 60 fu up to a mangan. The standard is to leave it off: that hand pays 7,700 on a non-dealer ron and 11,600 on a dealer ron.
Kazoe yakuman (数え役満) pays a hand of 13 han or more, yaku and dora together, as a yakuman. Tenhou and Mahjong Soul use it.
Local yakuman (ローカル役満, also 特殊役満, tokushu yakuman) are yakuman outside the standard list, such as renhou (人和) or shiisanpuutaa (十三不塔). The standard is to leave them out. You'll find them in the yakuman chapter.
Double yakuman (ダブル役満, W役満) and stacked yakuman (複合役満) are settled in advance too. The standard is to add up the yakuman in one hand: suuankou with daisangen pays as a double yakuman. Mahjong Soul also pays four yakuman as doubles on their own. Every case is in the yakuman chapter.
Nagashi mangan
Nagashi mangan (流し満貫) rewards a river of terminals and honors that nobody called: at the exhaustive draw you collect as if you'd won a mangan by tsumo. Tenhou and Mahjong Soul use it. M-League, WRC, and EMA don't. The exact conditions are in the yaku chapter.
Double ron and atamahane
What happens when two players call ron on the same tile? There are two rules.
With double ron (ダブロン, daburon; also 二家和, ryanchahou), both win and the discarder pays each of them. The riichi sticks and honba go to the winner closest in turn order to the discarder.
With atamahane (頭ハネ, head bump), only the winner closest in turn order to the discarder wins. The other ron doesn't count.
The standard is double ron. With three rons on the same tile, Tenhou declares an abortive draw (三家和) and Mahjong Soul pays all three.
Pao
Pao (包), or sekinin barai (責任払い, "liability payment"), punishes the player who hands over a yakuman. If you let an opponent pon or kan the last dragon triplet of a daisangen, or the last wind triplet of a daisuushii, you're liable for that hand:
- If that opponent wins by tsumo, you pay the whole yakuman alone.
- If they win by ron off another player's discard, you and that player pay half each.
Pao is standard today. On Tenhou and Mahjong Soul the liable player also pays the honba. Both yakuman are in their chapter.
Wareme, yakitori, and other parlor rules
These rules turn up in some parlors and home games. No reference ruleset uses them.
- Wareme (割れ目): the player whose wall was broken for the dora indicator pays or collects double that hand, except for tenpai payments.
- Yakitori (焼き鳥): a player who ends the game without winning a single hand pays a penalty. The name comes from grilled chicken skewers. Parlors that play it hand out yakitori markers, each with its own picture, and a player returns theirs on winning their first hand.
- Yakinaoshi (焼き直し): an extension of yakitori. If everyone has won at least one hand, it takes two wins to clear it.
- Yakibuta (焼き豚): another extension. If someone clears yakitori with a ron in the last hand (oorasu), the player who dealt in pays the same penalty.
Gambling is illegal in Japan. Reputable parlors and the pro leagues play for points.
The 2026 standard rules
This table replaces the Club Argentino de Mahjong (CAM) rules printed in the first edition. It's built on Tenhou ranked games (hanchan, red fives) and Mahjong Soul ranked games, which agree on almost everything. The differences column names only the exceptions (MS is Mahjong Soul).
| Rule | Standard | Differences |
|---|---|---|
| Kuitan, atozuke | On, on | Same everywhere |
| Kuikae | Forbidden, after pon too | M-League, EMA: dead hand |
| Pinfu by tsumo | Yes (20 fu) | Same everywhere |
| Start, return | 25,000, 30,000 | MS: 25,000, 25,000. WRC, EMA: 30,000, 30,000 |
| Oka | 20,000 to first (+20) | MS, WRC, EMA: no oka |
| Uma | +20, +10, −10, −20 | MS, WRC, EMA: +15, +5, −5, −15. M-League: +30, +10, −10, −30 (+50 to first with the oka) |
| Length | Hanchan (East and South) | Tenhou and MS also offer tonpuusen |
| West round | If nobody reaches 30,000; sudden death | M-League, WRC, EMA: no |
| Agari-yame, tenpai-yame | Automatic: dealer first with 30,000 or more in the last hand | M-League, WRC, EMA: no |
| Renchan | If the dealer wins or is tenpai | Same everywhere |
| Busting | Ends below 0 (at 0, play goes on) | M-League, WRC, EMA: none |
| Dora | Dora, kan dora, ura, kan ura, 3 red fives | WRC, EMA: no red fives |
| Kan dora | Closed kan: at once. Open or added kan: after the discard | M-League, WRC, EMA: always at once |
| Ippatsu | Yes | Official JPML rules: no ippatsu, ura, or kan dora |
| Noten payment | 3,000 in all | Same everywhere |
| Several rons | Double ron. Triple: Tenhou, abortive draw; MS, all three collect | M-League, WRC: atamahane. EMA: every winner collects |
| Abortive draws | 9 terminals, 4 winds, 4 riichi, 4 kans | M-League, WRC, EMA: none |
| Nagashi mangan | Yes (replaces tenpai payments) | M-League, WRC, EMA: no |
| Kiriage mangan | No: 4 han 30 fu is 7,700 | M-League, WRC, EMA 2025: yes |
| Kazoe yakuman | Yes (13 han or more) | M-League, EMA: sanbaiman. WRC: pays as yakuman, doesn't stack |
| Stacked yakuman | Added together | EMA: not added |
| Double yakuman for the wait, daisuushii | Tenhou: no. MS: yes | M-League, WRC, EMA: no |
| Pao | Daisangen, daisuushii | M-League, WRC: suukantsu too |
| Local yakuman, open riichi | No | WRC, EMA: renhou is a mangan |
| Riichi | With 1,000 points or more; allowed in furiten | WRC: also with less than 1,000 |
| Riichi sticks left at the end | To first place | WRC: to nobody |
| Tie on points | The seat closest to the first dealer wins | M-League, WRC, EMA: uma and oka are split |
| Chonbo | Doesn't exist online | Parlors: mangan payment. M-League, WRC, EMA: −20 points at the end |
| Ryanshi, wareme, yakitori, aotenjou | No | Same everywhere |
For anything the table doesn't cover, Tenhou's ranked rules (hanchan, red fives) apply. And as always, ask about the local rules every time you sit down at a new table.
Fouls and penalties
Break a rule, through bad faith or clumsiness, and you can take a penalty. The two most common are chonbo, for serious fouls, and the dead hand, for minor ones.
Chonbo
Chonbo (チョンボ) is paid like a mangan in reverse. The offender pays the other three what they would have collected on a mangan by tsumo:
- A non-dealer pays 8,000 in all: 4,000 to the dealer and 2,000 to each non-dealer.
- A dealer pays 12,000 in all: 4,000 to each player.
Then the hand is dealt again. No honba is added, the deal doesn't move, and any riichi sticks declared in that hand go back to their owners. Sticks already on the table from earlier hands stay where they are. The end of a hand chapter shows how honba and sticks work in a normal hand.
These fouls cost a chonbo:
- Declaring an invalid win and showing your hand: in furiten, with a dead hand, with no yaku, or on a tile that doesn't complete the hand.
- Declaring riichi without being tenpai, when it comes out at the exhaustive draw.
- Declaring a closed kan after riichi that changes your winning tiles (under some rules, also one that changes how the hand can be read).
- Exposing five or more tiles, your own, another player's, or the wall's (a house rule: in general, any mistake that stops the hand from going on fairly).
- Making a call with a dead hand.
Dead hand
When a foul doesn't deserve a chonbo, the offender's hand is declared dead. Play goes on as normal, but that player can no longer win, call tiles, or declare riichi. At an exhaustive draw they count as noten.
These fouls usually get a dead hand:
- Making a wrong call that can no longer be corrected.
- Making an empty call: saying "pon" or "chi" and not completing it. Some tables take a 1,000-point deposit instead of a dead hand. The winner of the hand collects it, and it goes up if the mistake repeats (a house rule).
- Exposing tiles from an opponent's hand or from the dead wall.
- Holding too many tiles (多牌, tahai).
- Holding too few tiles (少牌, shouhai).
- Kuikae (M-League and EMA punish it this way).
Cheating and aggression
Among friends, plenty of fouls get forgiven with no penalty. In a competitive game, they don't. And one thing isn't up for debate anywhere: a player who hides tiles, swaps tiles from their hand with tiles from the wall, cheats in any other way, or attacks another player is out of the game on the spot.